Add Related Products To Any Shopify Blog Post With Metafields
This should really be easier, but here's the solution.
Off topic of video, but I wanted to write about this because it does tie into my video work in a way that might be relevant to a lot of you with new Ecommerce Sites
Like a lot of you, I am interested in using videos to sell stuff so I’ve been busy on both YouTube and creating website content.
I’ve talked about this before here but the basic strategy is to use these two formats in a synergistic way.
You write an article, let it marinate and rank for a bit and assuming that goes well you come and refresh it later with a YouTube video. The article is a loose script. Maybe you add a bit more in the video and refresh the article to reflect that.
You can do the opposite too. Make a video, transcribe it, run that through a KW tool and then embed the video with a transcript below it.
Either way, you have a video, article content, images, and an excuse to refresh the content every now and then. So far, Google likes this approach because I’m giving it what it wants.
Lots of spider food, content updates, quality user experience. I’m convinced the only reason more people aren’t doing this is it’s a bunch of work.
Also, YouTube people are so hyperfocused on YouTube many of them don’t even have websites or know SEO.
SEO people on the other hand tend to be scared of making video content either due to unfamiliarity with the tech, lack of creativity, or extremely introverted personalities and doing a voiceover or god forbid appearing on camera isn’t in the cards.
The Problem
I want to show related products under my blog posts instead of an email signup form. I tried to add the section with Shopify’s 2.0 page editor and was not successful. I also tried a few plugins, but they mostly sucked or wanted a monthly fee for what should be a very simple, build it once kind of feature.
Why do I want this at all?
I have a bit of traffic now and get sales.
For a while I had an email signup form below every blog article and nobody ever touched it. Getting sales and near zero email signups seems a bit backwards.
My free lead magnet products do a better job of harvesting emails than a plain signup form. So the plan going forward is to keep publishing to the site but the bottom of every post will have free lead magnet products or paid products—whichever is more relevant to the content of the article.
The Metafield Solution
Here is how I built a product gallery that lives under every blog post I publish, which hopefully helps the conversion rate of the site.
At the least, it will help to push my lead magnet products to more people so I can advertise to them with email newsletters later.
The first step is go to shopify admin > settings > custom data > metafields under metafields, click "Blog Posts"
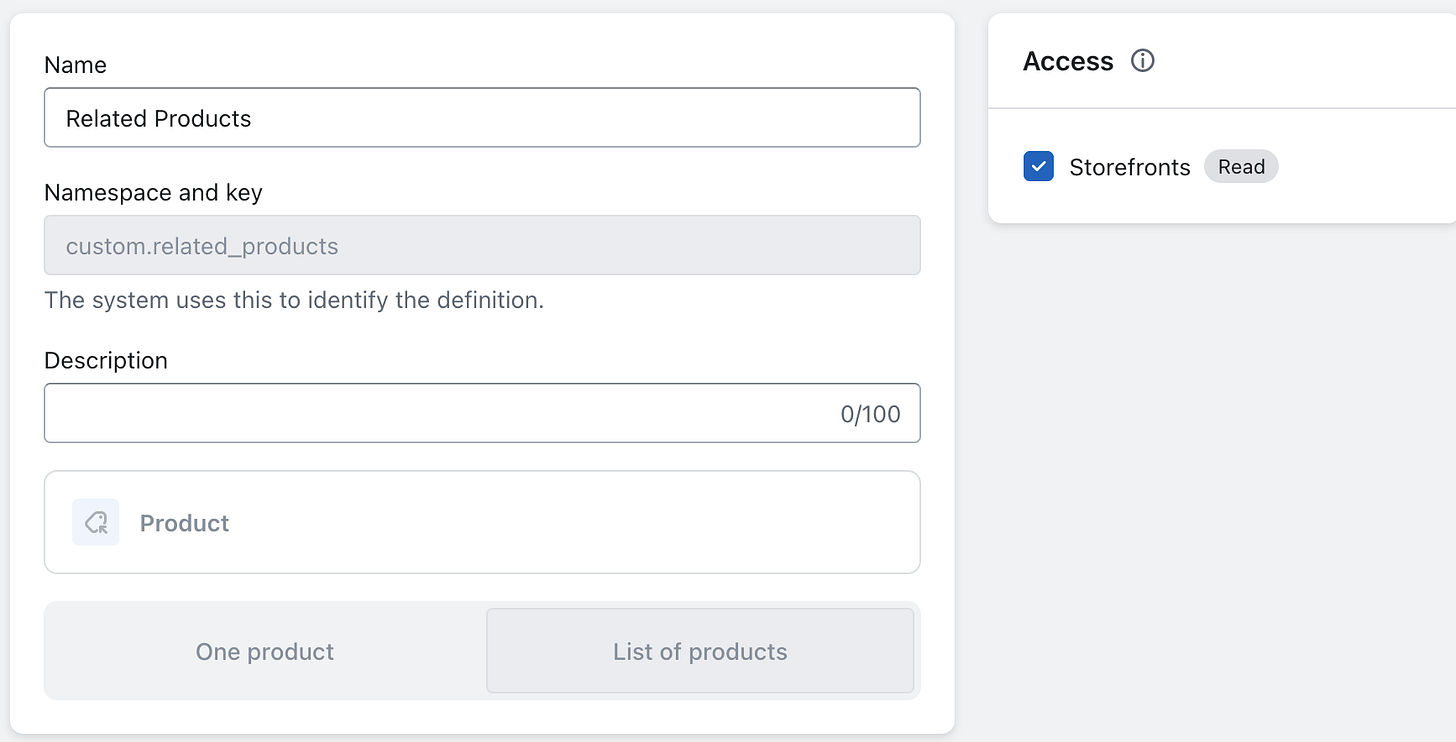
Under the Definitions tab, create a new definition (green button). I called mine Related Products, used the auto created namespace and key, then made sure it had access to my storefront hit save. At this step it looked like this:
Now we need to do some very light coding (you can copy mine)
In Shopify admin, Sales Channels > Online Store > Themes click the ... button and choose Edit Code.
Now you should be able to see all the liquid files that power your store. Liquid is Shopify’s templating language that let’s you grab data from a store and display it on a page.
Search for the article-template.liquid file. This is the file we need to modify.
It has a bunch of liquid code that basically asks the Shopify backend for data and dumps on the page.
First I like to make sure Shopify will be doing the dumping in the correct place so I’ll typically use a simple block of text and move it around the page until it appears where I want my new feature to be.
Make a basic html tag like <h1> PRODUCTS GO HERE</h2> and cut and paste it somewhere in the page and hit save. Make sure you keep your place in the liquid file.
Open any blog post on the site and Shift + click the refresh button (to force a hard refresh) you should see your h1 PRODUCTS GO HERE text somewhere on the page.
Repeat this until you find the correct place you want your product to appear.
For me, this is just under the social share buttons that come under the article content. In your liquid file, put a comment to mark this place like this
<!-- Related Products Block -->
<h1> PRODUCTS GO HERE</h2>
Now you’re going to delete the h1 tag and substitute the following code instead:
<!-- Related Products Block -->
{%- if article.metafields.custom.related_products.value -%} {%- assign related_products = article.metafields.custom.related_products.value -%}
{%- paginate related_products by 10 -%} <div style="text-align: center;">
<h2>Related Products</h2>
</div>
<div style="display:flex; justify-content: center; flex-wrap: wrap;"> {%- for the_product in related_products -%}
{%- if the_product.available -%} <div style="max-width: 250px; padding:15px;">
<a href="{{ the_product.url }}" title="{{ the_product.title }}" style=""> <img src="{{ the_product.featured_image | img_url: '250x250', crop: 'center', format: 'pjpg' }}" alt="{{ the_product.title }}" loading="lazy"> <p>{{ the_product.title }}</p> </a>
</div>
{%- endif -%}
{%- endfor -%}
</div>
{%- endpaginate -%}
{%- endif -%}
Here is an image with better formatting so you can understand what is going on here:
In very simple terms, We’re asking Shopify if the Metafield we created for this article has any value. If it does it creates an H2 tag with the text Related Products (change this to whatever you want), then it loops through the related products while skipping anything that is out of stock.
For each product, it spits out the product image and title and has this wrapped in a link tag to make it clickable. The block as well as the individual product links are wrapped in some <div> tags which add styling like making the products the appropriate size & centers stuff with flexbox.
Now if you Shift + click to refresh a blog post you will see…nothing! This is because you need to add some products to the metafield in that blog post.
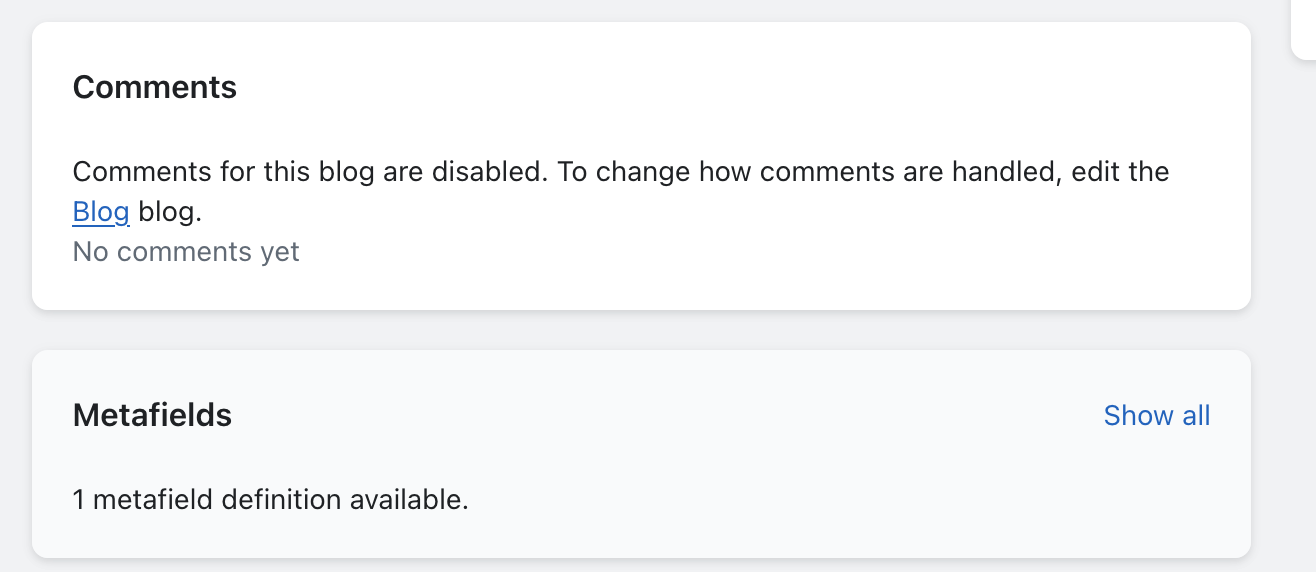
Navigate the the blog editor for the post you already have open. You should see this at the bottom of the post:
Click on the Metafields and at the next dialog screen you will be able to click and add whatever products in your catalog are relevant to that blog post. Save and refresh and you will see those products in the gallery under your article now (or wherever you decided to place the code).
You’ll probably have to add or change the styling because the inherited CSS on your site will certainly not be the same as mine, but this should give you a decent place to start from.
If the styling is a complete disaster on your site for some reason, just clear all the style attribute tags to style=““ to see what that gets you, then modify from there. In my case my product images were way too big, nothing was centered, & there was no padding.
Better For Bigger Stores?
This probably isn’t necessary for smaller stores with only 1-5 products. But if you have a store and plan to grow the catalog or already have a lot of SKUs, this will make things more scaleable.
What I’m liking about this approach is it turns each blog post into a mini-funnel without hard selling and better calibrate it to searcher intent. This is OK for some niches but the typical customer I’m dealing with would find that too aggressive and just bounce.
Instead I can write an Informational article and include some language in the video that directs people to a free lead magnet. Then embed that product in both the metafield of the blog post and the YouTube video description.
Alternatively, for articles that fall under Shopping or Customer Investigation intent, I’ll push the stuff that costs money because they’re already a but closer to buying something anyway. The page is just there to build some trust and give them a feel for the brand.


