How To Create Your First AI Animation
A beginner's guide to using Deforum's Stable Diffusion Colab notebook.
The last few posts have been written around conventional videos but today we’re going to learn how to make an AI animation.
Below is an example of what we will make. Ableton is conventional music production software. The basic process was to generate the video then write a track to sit under it. You can also use sound from a stock library which I talked about last week
If you Google AI Video or AI animation, you’ll find a bunch of boring products designed to generate corporate training videos. This is not from that side of the internet.
Today we will be using Stable Diffusion and running it with the Deforum Colab Notebook. Beyond that, you’ll need a Google account, a little free space on your Drive, and maybe video editing software to assemble the video. If you don’t have a preference, use Davinci Resolve because its free and awesome.
Wtf is a Colab Notebook?
I have a bit of coding experience and was still asking this question. Colab is a hosted Jupyter Notebook, which is an open source platform that allows you to have a document with blocks of code you can execute.
The good people at Deforum have a notebook that allows you to use Stable Diffusion relatively easily.
The easiest way to get this setup and moving quickly as of today is on Google Drive. Once you’ve figured that out, you can look into running the notebook on remote GPUs or locally.
The Setup
Login to a Google Drive account that has some space available. You’ll need a few GB to upload the AI models and some additional space for the video frames you will render with Stable Diffusion.
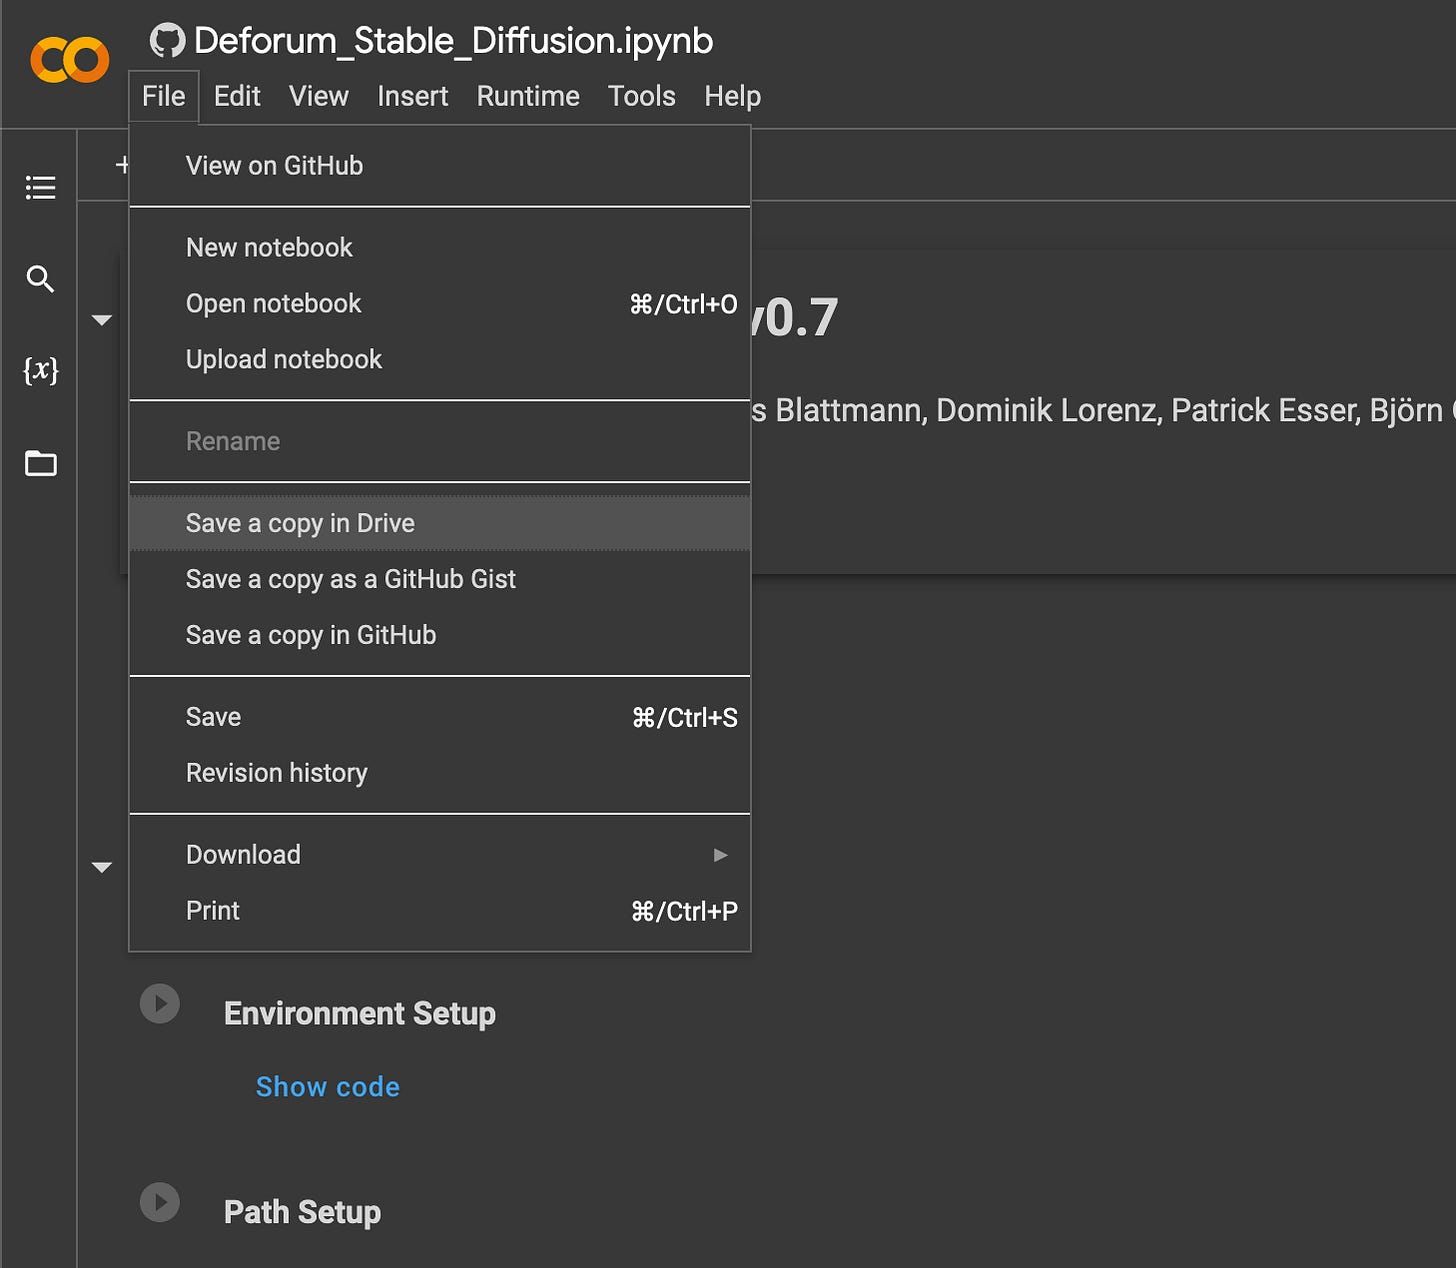
Go here to get the latest version of the Deforum notebook (currently on version 0.7) and save a copy to your Drive:
You will notice little play buttons next to each of the blocks of the code. You’re going to run through them one by one and we will solve problems as we go. The people at Deforum change things as they work and upgrade new versions so sometimes you’ll run into issues and have to deal with error messages.
Next, go make an account on HuggingFace.co. You’ll need this in a few steps. This is where we will be getting data models for Stable Diffusion to work. Later on, you can try swapping out models trained on different data or other versions of SD to achieve different results.
GPU Connection
Ok, in your copy of the notebook, hit the play button to run your first block of code and get connected to a GPU. It should show you a green check and tell you what kind of GPU you’re connected to after a few seconds.
Environment Setup
The next block usually takes a minute or two on the free tier of Colab. This is going to install a bunch of packages we need to run the notebook.
Path Setup
Next, we need to tell the notebook that it can make changes in google drive, create folders, add files etc. I recommend using a fresh account just for your AI experiments, not a work account or one with lots of personal stuff.
You also need to to tell the script which model or checkpoint to use and where to get it. You can play around with the various models and look up the differences, but I recommend starting with 1.4.
First, hit the play button and allow it to access your Google Drive account. Once that’s done you’ll see this:
Enter your username from the Huggingface account you made earlier. This is where it will download the model from.
Next it will ask you for a token. Login on HuggingFace.co, click your avatar picture then
Settings > Access Token
Copy your token and paste it into the prompt in the notebook and the checkpoint file will begin downloading. It is over 4GB so you might need to wait a bit while this happens. Once the model downloads and loads you’ll be able to proceed.
Animation Settings
The next section has a lot of options you can play with. I don’t know what they all do, I’m still learning this myself and Deforum changes things with new versions, but we’re going to cover the major stuff to get you rendering ASAP.
Let’s start with 2D animation_mode, but I encourage you to play with all of them.
max_frames is just that. How many frames do you want to render? I have 1000 set here, but you might want to set it at 500 so the render time is shorter and you can experiment more.
Most of you have used image generation AI like DALL-E or Midjourney which renders a single image from a text prompt. How an AI animation works is by rendering single images, except there is some coherence maintained from image to image (we can adjust that too!) so when we combine them in a sequence, we see motion.
For the motion parameters, use the following settings. You’ll be changine zoom from 1.04 to 1 (so no zoom) and deleting the equation from translation_x and setting it to zero (like banks) instead.
This should generate a video with no motion side to side, up and down, and no pushing in or pulling out. You can play with all that later, lets just get this thing drawing us pictures.
Don’t worry about any of the other settings. Click the play button next to this block to set the variables. If you change you mind later, you need to click the play button again to change your settings.
Prompts
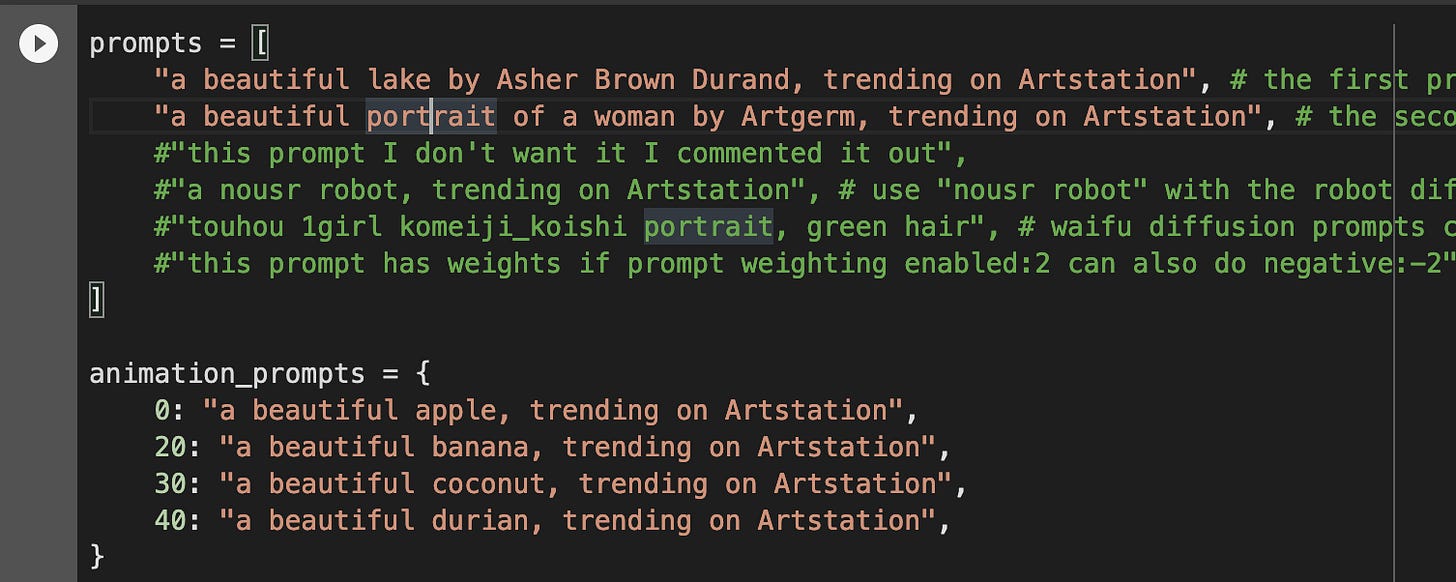
This should look more familiar if you’ve played with image AI before. The upper section can be left blank, thats for generation of images.
The animation prompts show a number that corresponds to a frame in your sequence, then the prompts you want it to apply at that time.
So if you wanted to generate an animation of an indian god turning into a wolf (for the 0.01% of you that will get that reference) you might do something like this to get started:
prompts = []

animation_prompts = {
    0:”indian god, cyberpunk, 4K hyperrealistic”,
    500:”wolf in a dense forest, neon, trending on artstation”,
}
If you have no idea how to write a good AI prompt (I didn’t) go over to PromptHero or a similar site to get some inspiration for cool prompts to try or keywords you might not have thought of otherwise.
Hit the play button to load your prompts.
Load Settings
Again, lots of settings in this section and hours of exploration here. You can control prompt weighting, set an initial image to tell the AI to begin with, or fine tune certain areas of the render.
For today, lets keep it simple. You might want to change the dimensions to be horizontal or vertically oriented. Its important to know that the dimensions need to be multiples of 64 or they are rounded. I’ve had less issues just giving it what it wants from the start.
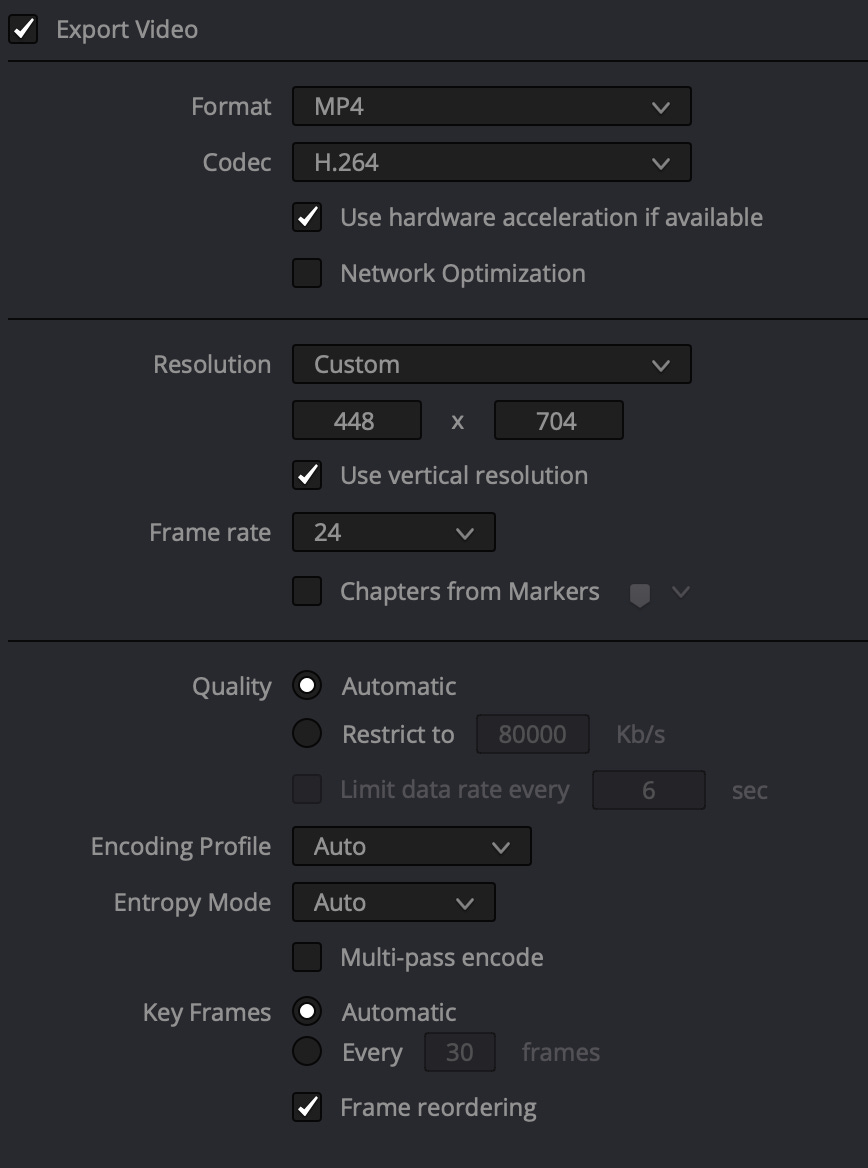
So for example a vertical video seems to render will with dimensions of H: 704 and W: 448. This is not true 9:16 video, but close enough for our purposes.
You also might want to change the batch_name variable. This is just the name of the folder in your drive its going to dump the frames into.
Set the number of steps to 25 (default is 50, this will speed things up a bit but as always experiment) and change the sampler type to euler (there are a bunch).
Note: For some reason when I use the default setting for of ddim for the sampler type, it renders one really cool frame, then a bunch of vague, noisy frames after that which are not so interesting or coherent. Probably some setting I haven’t played with yet.
Hit the play button. If all is well, you should start seeing frames generated.
Go Make A Cup of Yerba Mate
This part takes a while. Get this running then go hang out or do something else.
If you want to see how the animation looks before it’s done. You can download the frames that are rendered and throw them into Resolve (more on this in a second) and see how it looks, then decide if you want to continue the render or tweak settings and start over. Since this is your first time, I’d recommend just letting it go and see what happens!
Also, you won’t get the same thing just running the same prompt over again so that’s worth a try as well.
Assembling The Video
I find that the Create Video From Frames block often doesn’t work for me. This is to combine your frames into a playable video file.
Not a huge deal, I prefer to assemble the frames in Resolve anyway in case I want to do some light editing.
Don’t be overwhelmed by the folder with 1000 png files that need to be combined.
Download the folder from Google Drive where your rendered images are and open a new Davinci Resolve project.
Now highlight all the PNG images in your render folder and drag them into a fresh Timeline in Resolve. It will see that it’s a sequence and automatically combine them into a single clip. You may have to make a new timeline that matches the resolution of the video.
From there, go to the Deliver tab in Resolve, name it and choose a place to save it, then render it as a MP4 file in the H.264 codec.
Congratulations!
If you’re here, you rendered a video with Stable Diffusion! Play around and experiment. In addition to stock libraries, this is a cool way to generate footage that you can edit with. You can use other AIs to upscale your footage to larger formats if you have an HD or 4K edit you want to use the footage in.
At least for the moment, this is novel enough that you may be able to get some social media engagement just by being able to make these at all. Try it out and see how people respond. As you can see, there are some minor technical obstacles that need to be overcome and will keep the masses out for now.
I find that this Colab notebook tends to mostly work. But errors occasionally happen. If you hit problems, you may have to just shut down the instance and try it again from the beginning. The main issue you will hit next is Google limiting your access to GPUs because they want you to pay for Colab Pro. This is an option, but in a future post we can talk about renting GPUs to run the Deforum script for cheaper than what Google wants you to pay in compute units.
Make some renders and show me what you can do on Twitter, Instagram, Tiktok or come lurk in the Deforum Discord with me. My handle is BowTiedTamarin on all these platforms.
Very Important Note
I’m currently doing free posts on Mondays. Pledge a subscription amount you feel is fair (new Substack feature!) if you’d like me to do to paid posts on top of this. If enough people do it, I’ll turn on paid subscriptions and be able to devote more time to these guide and deep dives on audiovisual content tech.


Amazing, thank you